GROUPON GUIDE TO PORTLAND-ME
Forget Sports. These DIY Felt Pennants Salute What Really Matters.
BY: Amelia Buzzell |Oct 18, 2022
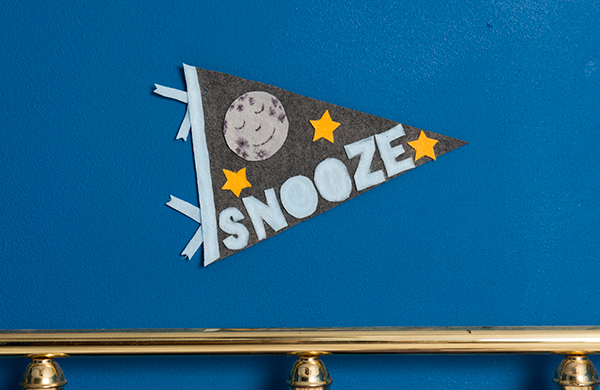
 Hanging a pennant on the wall has long been the perfect way to show your school spirit or pledge allegiance to your favorite sports team. Lately, though, pennants have also entered the world of interior design, emblazoned with everything from cheerful phrases to fake team names.
We’re jumping on the trend with DIY pennants for three spaces in your home. If you’re a fan of Team Snooze Button or a graduate of your own imagined culinary college, take heart: with a little felt, a sharp pair of scissors, and some thread, you too can add rah-rah flair to your walls.
Step 1: Print Out a Downloadable Template
Hanging a pennant on the wall has long been the perfect way to show your school spirit or pledge allegiance to your favorite sports team. Lately, though, pennants have also entered the world of interior design, emblazoned with everything from cheerful phrases to fake team names.
We’re jumping on the trend with DIY pennants for three spaces in your home. If you’re a fan of Team Snooze Button or a graduate of your own imagined culinary college, take heart: with a little felt, a sharp pair of scissors, and some thread, you too can add rah-rah flair to your walls.
Step 1: Print Out a Downloadable Template
 Each one fits on a regular 8.5”x11” piece of printer paper. There are three templates to choose from:
- Click here to print a template for the bedroom (“Snooze”).
- Click here to print a template for the kitchen (“Sizzlin’”).
- Click here to print a template for the office (“Work It”).
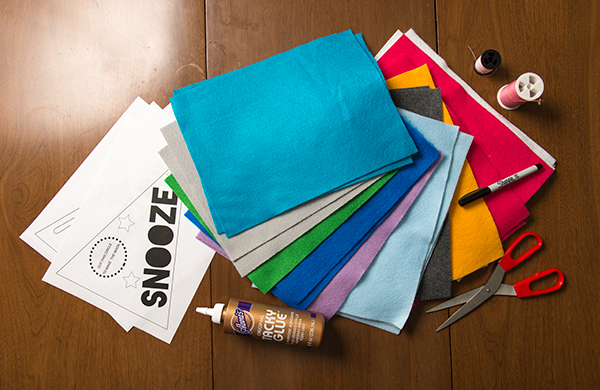
- Up to five pieces of pre-cut felt from the craft store (approximately 8.5”x11” each): one piece for the main pennant body, two pieces of another color for the slogan and tails, and, depending on the design you choose, more colors for accents
- Scissors
- Tacky craft glue
- Needle and thread
- Pencil or chalk
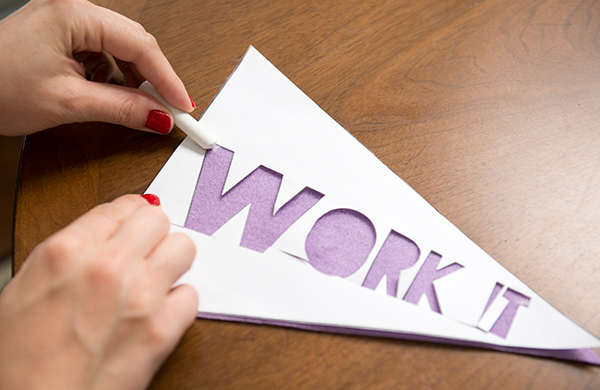
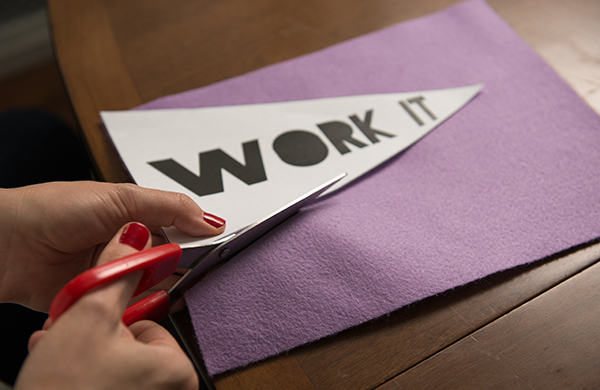 Cut the outline of your pennant from the template and use it as a guideline to cut a large triangle out of felt.
Step 4: Cut and Trace the Slogan, Accents, and Tails
Cut the outline of your pennant from the template and use it as a guideline to cut a large triangle out of felt.
Step 4: Cut and Trace the Slogan, Accents, and Tails
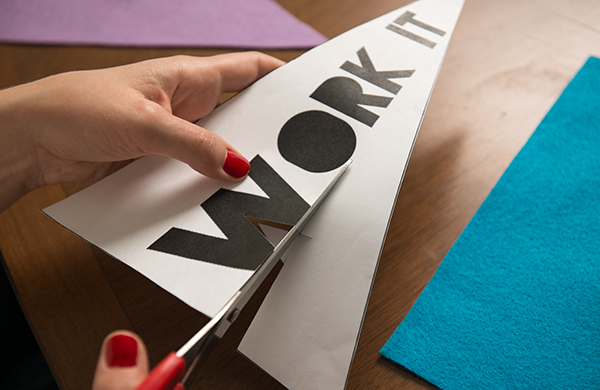 Cut individual letters from the pennant template. Arrange them on felt of another color, and trace around them with pencil or chalk for accuracy. Cut the letters out of the felt and set aside. If your template has accents (the fork and spoon or the moon and stars), cut these out the same way. Repeat for the contrast border and matching tails.
Step 5: Arrange the Parts
Cut individual letters from the pennant template. Arrange them on felt of another color, and trace around them with pencil or chalk for accuracy. Cut the letters out of the felt and set aside. If your template has accents (the fork and spoon or the moon and stars), cut these out the same way. Repeat for the contrast border and matching tails.
Step 5: Arrange the Parts
 Lay what’s left of your template over the felt pennant base, or simply use it for reference. Arrange the letters, accents, contrast border, and tails on top to make sure they fit. Tweak exact letter and accent placement if necessary.
Step 6: Sew On the Border and Tails
Lay what’s left of your template over the felt pennant base, or simply use it for reference. Arrange the letters, accents, contrast border, and tails on top to make sure they fit. Tweak exact letter and accent placement if necessary.
Step 6: Sew On the Border and Tails
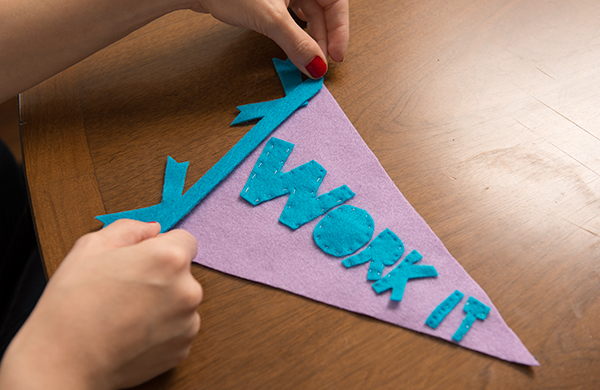 Sewing the tails and border is recommended, as three layers of felt (base, tails, and border) won’t hold up as well with only glue to bind them. Sew the tails to the base first. Then lay the contrast border on top and sew along its perimeter.
Step 7: Sew or Glue On the Letters and Accents
Sewing the tails and border is recommended, as three layers of felt (base, tails, and border) won’t hold up as well with only glue to bind them. Sew the tails to the base first. Then lay the contrast border on top and sew along its perimeter.
Step 7: Sew or Glue On the Letters and Accents
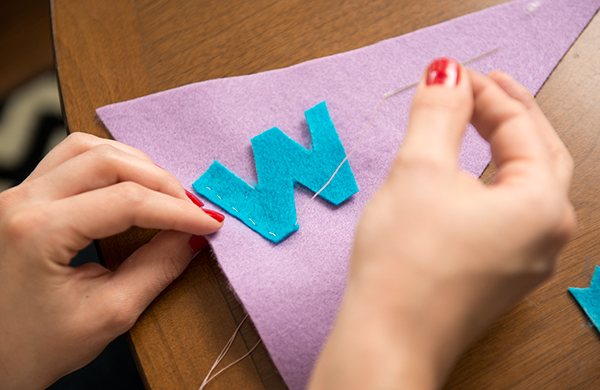 Sewing by hand creates an imperfect, old-fashioned look but can be time-consuming. Gluing requires careful placement and generous slathering but can be completed more quickly. The choice is yours.
Step 8: Hang It Up
Sewing by hand creates an imperfect, old-fashioned look but can be time-consuming. Gluing requires careful placement and generous slathering but can be completed more quickly. The choice is yours.
Step 8: Hang It Up
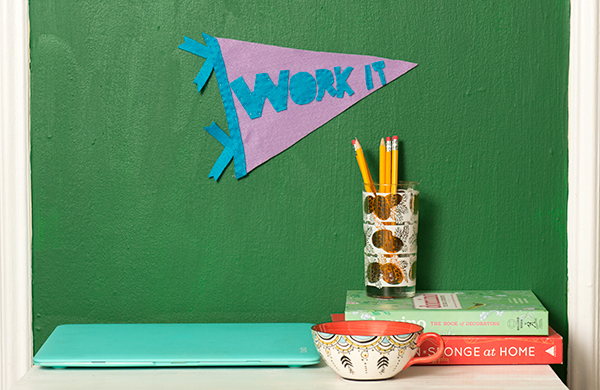 Once any glued-down pieces have dried completely, hang your new pennant on the wall. We recommend using small thumbtacks or extra-small nails. (We used tape, which was unwise.)
Photos by Andrew Nawrocki, Groupon
Read more DIY stories to learn how to make things like a hanging garden fit for a tiny apartment or a piñata no human can resist bashing to bits.
Once any glued-down pieces have dried completely, hang your new pennant on the wall. We recommend using small thumbtacks or extra-small nails. (We used tape, which was unwise.)
Photos by Andrew Nawrocki, Groupon
Read more DIY stories to learn how to make things like a hanging garden fit for a tiny apartment or a piñata no human can resist bashing to bits.
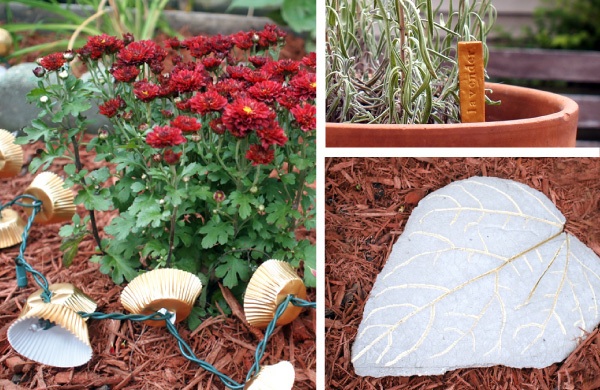
Make Your Garden Glam with These Easy DIY Projects
Cement mix, cupcake liners, and a little gold paint are virtually all you need to inject a little glamour into your green space.
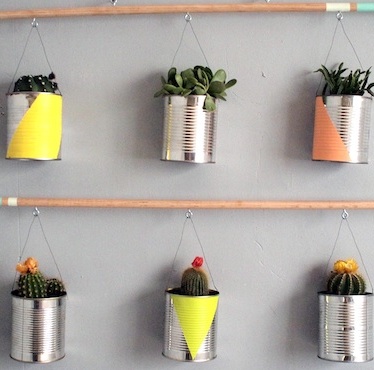
How to Make an Indoor Hanging Garden for Your Apartment
Good news, apartment dwellers: all it takes to make this garden are a few tools, some tin cans and chain, and plants—no backyard required.

Steal These Easy Decorating Ideas for Your Barbecue
Floating candles, a ring-toss game made with empty iced-coffee bottles, and other summer craft ideas even beginners can handle, no sweat.
BY: